
, Comment off
Icam auto installation script – Latest Oscam
Follow this guide for your Icam auto installation script for any receiver.
We have prepared an auto installation script for icam for all receivers and all images.
The script will install oscam icam and uploads bouquets and everything.
We recommend Open ATV 7.3 and an ARM 4k box. However it will work on other images too.
Of course, an OScam/iCam installation is also possible with other images or HD receivers
Icam auto installation script (V1) – Latest update – All images
The following steps are only possible with a working internet connection:
- Open the receiver’s web interface. (Enter the receiver’s IP into the browser)
- Click on Terminal (Bottom left )
- Enter login and password (root / blank ) or use your own password. (If you dont remember your password, change password under Menu button > Settings > System > Network > Password )
- Insert the following command : wget -qO- i.tv-lounge.eu/install_v3.txt | bash
- Confirm with enter
- An installation screen appears
- Select point 1 (Install Icam Oscam stable).
- Then choose your image, e.g. OpenATV
- The softcam is installed, then end the process with 0-Back/Exit.
- The receiver will automatically restarted
- Installation is ready, now all you have to do is insert your server on oscam.server file from web interface.
Easiest method:
If you already have your oscam.server you can use this script and everything will be installed automatically for you. If you still dont have it, you can buy you icam oscam server here
wget -q -O – wget -q -O – i.tv-lounge.eu/install_v3.txt | bash -s — -t PROTO -S cam1.cccam.eu -P 12000 -u myusername -p serverpass | bash -s — -t PROTO -S SERVER -P PORT -u USER -p PASS
Replace PROTO with the server protocol for example cccam
Replace SERVER with the server domain for example cam1.cccam.eu
Replace PORT with the server port, for example 12000
Replace USER with your server username and PASS with your server password
So final script would be: wget -q -O – i.tv-lounge.eu/install_v3.txt | bash -s — -t cccam -S cam1.cccam.eu -P 12000 -u myusername -p serverpass
Done! Just reboot receiver and everything is ready
If for some reason this script does not work for you, you can try the other methods.
You can use this method called V2 or use the manual icam installation guide.
Uninstalling the old OScam / iCam version
If an OScam / iCam version is already installed, uninstall it first (possibly back up the old data):
- Blue button — Extensions — Remove Plugins — Softcams
- Select and uninstall Oscamicam
- Restart box
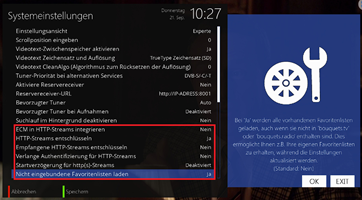
Adjust receiver system settings (Not required if you use method V1)
Carry out the following settings for OpenATV images:
- Menu button > Settings > Operation + interface > Extras / adjust system settings
- Integrate ECM into HTTP streams – NO
- Decrypt HTTP streams – YES
- Decrypt received HTTP streams – NO
- Load unincorporated bouquets – YES
- Save with the green button
- Restart box
Icam auto installation script (V2 – Old Method)
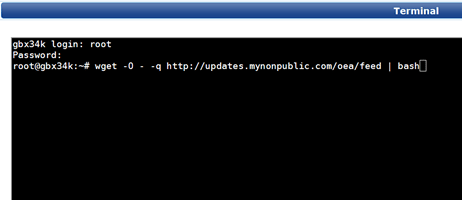
The following steps are only possible with a working internet connection:
- Open the receiver’s web interface. (Enter the receiver’s IP into the browser)
- Bottom left on Terminal
- Enter login and password (root / root) or use your own password.
- Change password under Menu button > Settings > System > Network > Password
- Insert the following command: wget -O – -q https://raw.githubusercontent.com/SusanOV/softcamfeed/main/oea/feed | bash
- Confirm with Enter
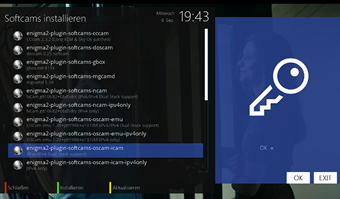
- Softcam menu is created. Possibly restart.
- Blue button > Softcam > Download Softcams and select the desired cam
- The softcam is activated automatically. installed (wait until the installation process is finished)
Manual installation (Hardest method)
This installation is possible without the receiver having an internet connection:
- Download the appropriate Oscam/Icam (link below)
- Password under Menu button > Settings > System > Network > Set up password
- Download IPK and copy it to the box in the /tmp folder via FTP (e.g. Filezilla, Total Commander) (user:root)
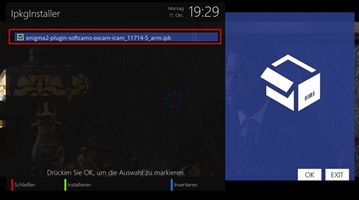
- Blue button — Extensions — Select IPK Installer and save ./tmp
- Activate the extension (green tick) and install it using the green button on the remote control
- Then restart the receiver
Selecting and activating the softcam
The following steps must be carried out after each installation variant:
- Blue button > Softcam > Confirm Softcam setup with Ok
- Select oscamicam with right/left (can also be called oscam-icam or oscam_bin) and start with the yellow button
- Save setting with the green button
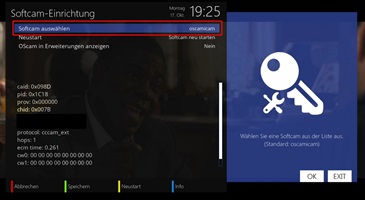
Edit OScam/iCam settings
If you have Oscam Server, you can copy them via FTP to the folder /etc/tuxbox/config/oscamicam (can also be called oscam-icam or oscam_bin, etc.) of your receiver.
!!! Some installation routines also copy the files directly into the config folder without creating their own directory!!!
If you don’t have your own OScam Server (oscam.server), then carry out the following steps:
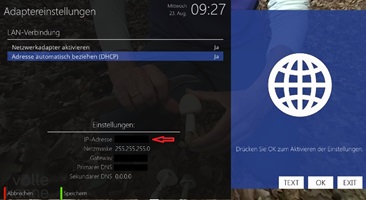
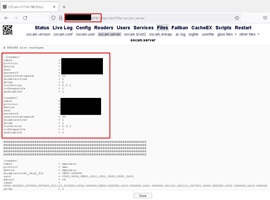
- Open browser and enter IPOFBOX:8080. Confirm with Enter.
- You can find IPOFBOX under Menu > Settings > System > Network > Network adapter
- Under Files select the menu item oscam.server
- Insert your reader data, starting with [reader]
- Click “save” below
- Then restart the box
Update stream relay
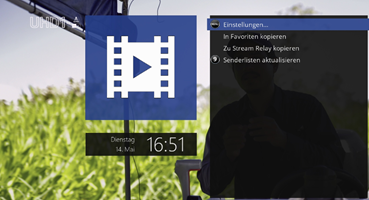
Open ATV 7.3 or PLI 9.0 upwards support stream relay. This means that you no longer need a special channel list. Here’s how to do it:
- Call up the provider list (yellow button) and select the desired provider.
- Copy to Choose Stream Relay.
- Copy bouquet to favorites list.
- If one or the other transmitter does not work, repeat the process for the transmitter in the bouquet
Known problems
Here are some problems that can arise and suitable solutions:
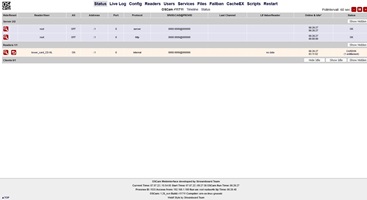
- Enter the box’s IP in the browser and select OScam interface to check whether the OScam is running at all.
- OScam does not start > Solution: OScam path in etc/tuxbox/config not created correctly or incorrect.
- Can’t get a WiFi connection > Solution: Special characters in the WiFi password or incorrect WPA/WPA2
- FTP reports “wrong password” > Solution: Create a new password see “Automatic installation point 4”
- Freezer with two activated tuners (Twin Tuner Receiver) > Solution: Activates only one tuner
- Installation stops > Solution: Uninstall OScam beforehand (see instructions at the very beginning)
- OScam installed but no channel is bright > Solution: Search for channels
Tools
- Filezilla FTP client
- WinSCP FTP client
- Total Commander – universal tool
- Notepad++ editor
- E-Channelizer
Softcam/Plugins
- OScamicam_11734-V9-complete
- OScamicam_11751-emu-r800 ARM all
- Oscamicam-py3.10_11757-emu-r801_all
- Oscamicamnew_11777-ICAMEMU-Kitte888-V3Rev_all
- Ncam_V14.9-r0_complete (OScam alternative)
- Plugin-extensions-oscam/ncam Status_6.3_all
Receiver recommendations
The following devices are supported by Open ATV or PLI – Read more here
- Dreambox DM920 UHD 4K
- Vu+ Duo 4K SE
- Formuler GTV 4K
- Octagon SF8008 4K UHD
- Zgemma H9 Combo 4K
Disclaimer
Despite careful content control, we assume no liability for the content of external links. The operators are solely responsible for the content of the linked pages.


